Outlook is one of the most popular email clients on Windows and Mac. In Windows, data is saved in PST while in Mac it is saved in OLM format. In case a user wants to switch from Mac to Windows, she would need to first convert the data from OLM to PST. But, there’s no direct method available to perform the conversion. Thus, users have to go through a series of conversion phases involving several steps. In this blog post, we’ll share the easiest method for OLM to PST conversion.
Before moving further, let’s first have a look at the common reasons as to why a user would want to convert data from Outlook for Mac to Outlook for Windows.
Reasons for converting OLM to PST
There could be several reasons for switching between these two Operating systems. Few of these could be following:
- A user may have been switching from macOS to Windows altogether, so the need to move OLM file data to PST could emerge from this larger requirement.
- A user may need to convert OLM to PST for sharing email data file with other people (such as co-workers) who are using Windows systems.
- A user having both Windows and macOS systems may sometimes need to access the mailbox data on both machines, for which there could be a need to convert OLM to PST.
Methods to migrate OLM to PST
OLM to PST conversion can be achieved in one of the two ways. The first method is largely manual including four steps:
- Create an IMAP enabled account
- Configure Outlook for Mac with the IMAP account
- Export Outlook for Mac emails to an IMAP account
- Configure Outlook for Windows with the same IMAP account
While this method is free of cost, it is quite complex and time consuming. If you consider using this method, you may require a certain extent of technical expertise.
The other method for converting OLM to PST is semi-automated, with following stages:
- Export the data from Outlook for Mac
- Convert OLM to PST format (by using conversion software)
- Import PST file in Outlook for Windows
Each stage involves a few steps. Let’s discuss them in detail below:
Stage 1: Export Outlook for Mac data
First of all, you would need to export the data from Outlook for Mac. To do this, follow the below listed steps:
- Click on Tools tab, select Export option to export Outlook data to OLM file format.
- In the dialog box Export to Archive File (OLM), select the items you want to export (e.g. Mail, Tasks, Calendar, Notes, and Contacts), and click Continue.
- Now, from the Save Archive File (OLM)as dialog box, look for Favorites in the left pane, choose Downloads folder, and click Save.
- Data will start exporting and once it’s done, you will receive a notification. After receiving the notification of successful export, click on Finish to close the procedure.
Stage 2: Converting OLM files to Outlook PST
To access your emails in Windows, you would need to convert the OLM file to PST format. Stellar Converter for OLM provides a fast and easy way for OLM to PST conversion. Download and install the tool and follow the given instructions to complete the conversion.
- Launch the software and from the main screen, select OLM mailbox by using the ‘Browse’ button. If you don’t know the location of the OLM file on the system, use the ‘Find’ option.
- Once the file has been selected, click on ‘Convert’ to start the scanning process
- When scanning finishes, all convertible items will be displayed in a tree-view list in the software’s left hand panel. From this list, you can double-click on any item to preview it in the right hand panel.
- If satisfied with the preview, to save converted file, click on ‘Save’ from the main menu
- Choose PST as the output format and click on ‘Next’
- Now select if you wish to save the data to an existing PST or wish to append it to a new PST
- Then select the destination file and click on ‘Next’
- When the file is saved, you will receive a notification of the same.
Stage 3: Importing PST files in Windows Outlook
Final step in conversion is importing of PST files to Windows Outlook. To do that, follow the below mentioned steps:
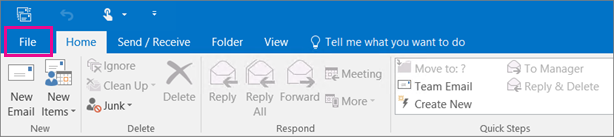
- Open MS Outlook and select File.
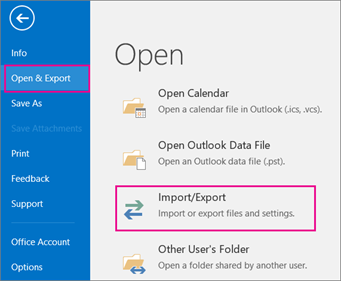
- Select Open & Export -> Import/Export.
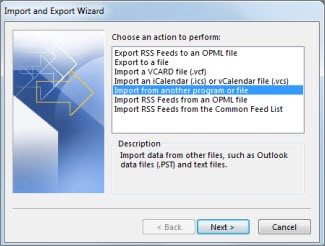
- In the Import and Export wizard select Import from another program or file, and then click on ‘Next’.
- Now, select Outlook Data File (PST)and click on ‘Next’.
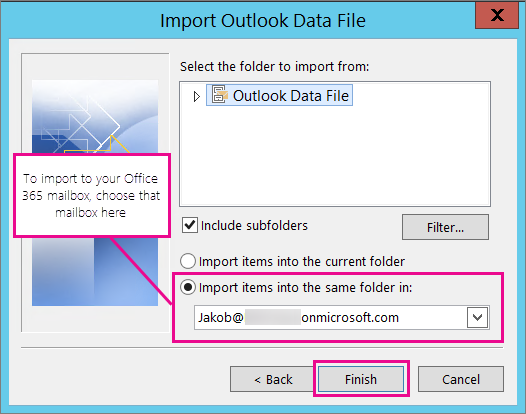
- Select the file to import by clicking on the Browse button; under Options select the suitable option and click ‘Next’.
- At the end, select Import Items into the current folder and click Finish.
After this step, all your emails and other mailbox data will be available to view in Microsoft Outlook.
Conclusion:
In this article, we shared the methods for importing emails from Outlook for Mac in Windows in the simplest way. There is a manual way to convert OLM files to PST but it is complex, time consuming and requires technical knowledge. Alternatively, there’s another semi-automated method which is faster and more reliable. Based on OST to PST converter software, this method is easier to execute and can be readily attempted with help of the trial version of the software.